Enhance the security and convenience of your ZendWallet account by enabling biometric login.
Follow these steps to set up Biometric Login: #
1. Go to Your Wallet: #
Open the ZendWallet app and navigate to the “Wallet” section.
2. Access Security Settings: #

In the Wallet section, tap “Security” to open the security settings.
3. Enable Biometric Lock: #
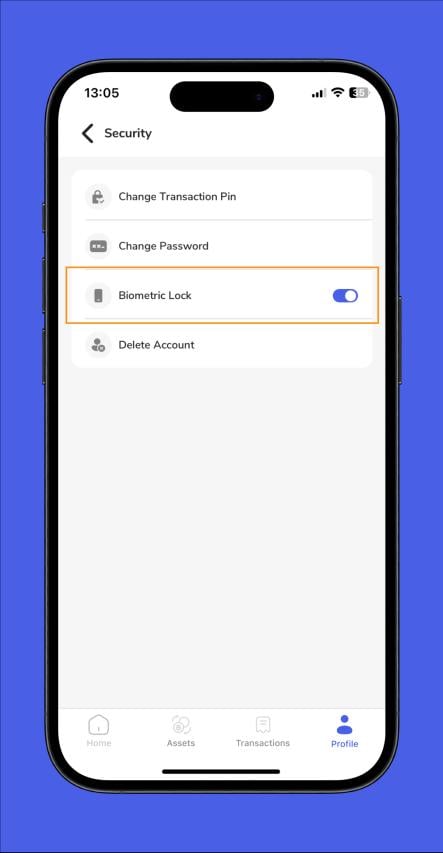
Locate the “Biometric Lock” option within the security settings and tap on it.
4. Choose Your Biometric Method: #
Select either Face ID or Fingerprint recognition as your preferred biometric method. If your device supports both, you can also enable both.
5. Complete the Setup: #
Follow the on-screen prompts to register your ID or Fingerprint.
Troubleshooting Biometric Login Issues #
1. Biometric Setup Not Completing: Ensure your device supports the selected biometric method (Face ID or Fingerprint). Make sure your device’s biometric sensor is clean and functioning correctly.
2. Biometric Login Not Working: Double-check that the biometric feature is enabled in the ZendWallet app. If the issue persists, disable and re-enable the biometric lock or restart your device.
3. Inconsistent Biometric Recognition: Re-register your Face ID or Fingerprint to improve accuracy. Ensure your fingers are dry and clean or your face is well-lit for Face ID.
Overview
Setting up a biometric login on ZendWallet boosts security and simplifies access.
With Face ID or Fingerprint recognition, you can log in instantly without entering an OTP.
If you face any issues, refer to the troubleshooting tips or contact ZendWallet’s support team for help.


